


There are so many different functionalities available to use your Clinked portal, both for the set up and ongoing usage. It can be difficult to know the best ways to make the most of the vast selection of features for your unique use case. In this blog I’ll go through some of the different features of Clinked (that you may not be aware of) and how they can help you maximise efficiency within your portal, both when setting up and for everyday use.
Setting up
When initially setting up your account, there are certain practices that you can use to minimise the amount of time spent on creating your groups.
Create a Template Group (Duplicating groups)
If you have a standard structure that you want to follow for all of your groups, instead of setting them up individually you can create a “template” group that follows the correct folder structure, welcome message etc. You can set this group up as a normal group in your account, just name it "Template". Then in order to create all of your groups (clients, partners e.g.) from the template group, you can use the ‘Duplicate Group’ functionality.
1. Select Duplicate Existing from the drop down.
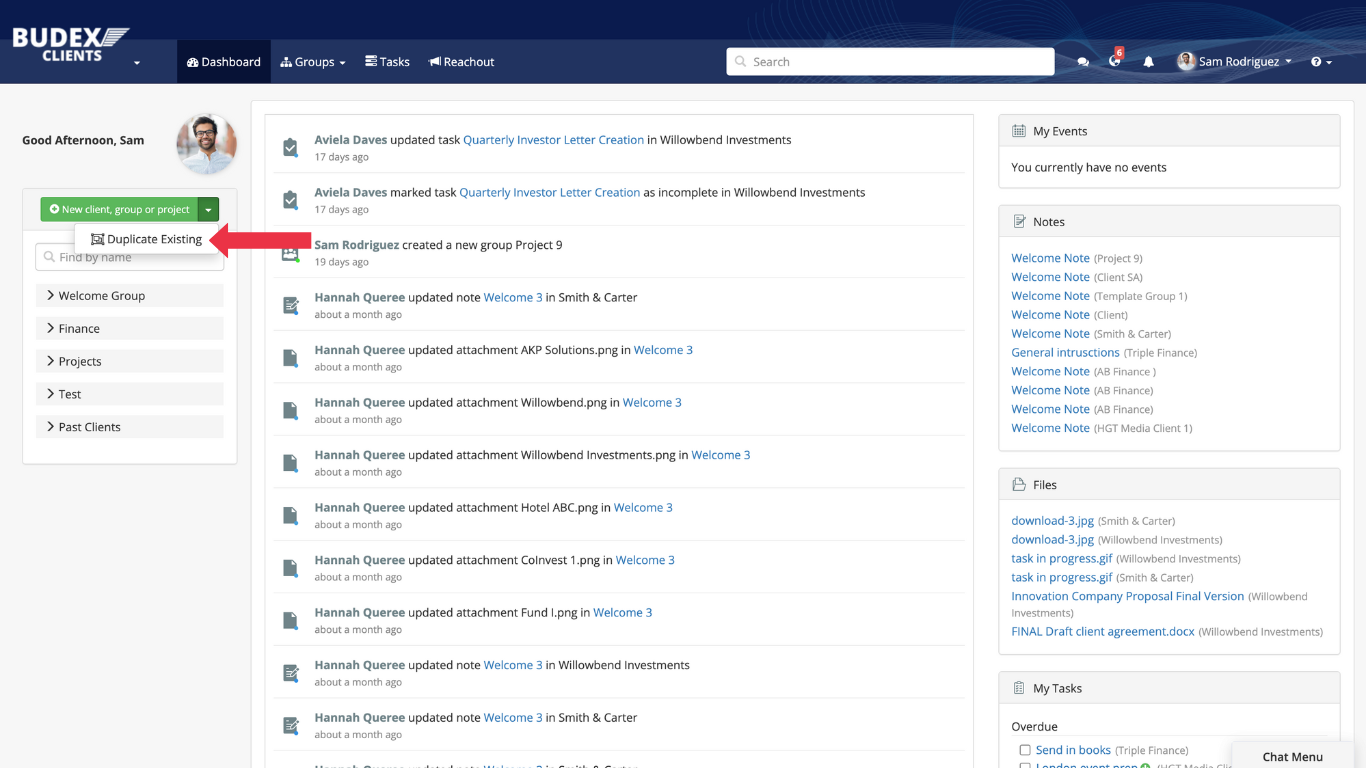
2. Enter the name of the group you are creating, and select the template group you would like to duplicate, when you hit Duplicate the new group will be created as an exact copy.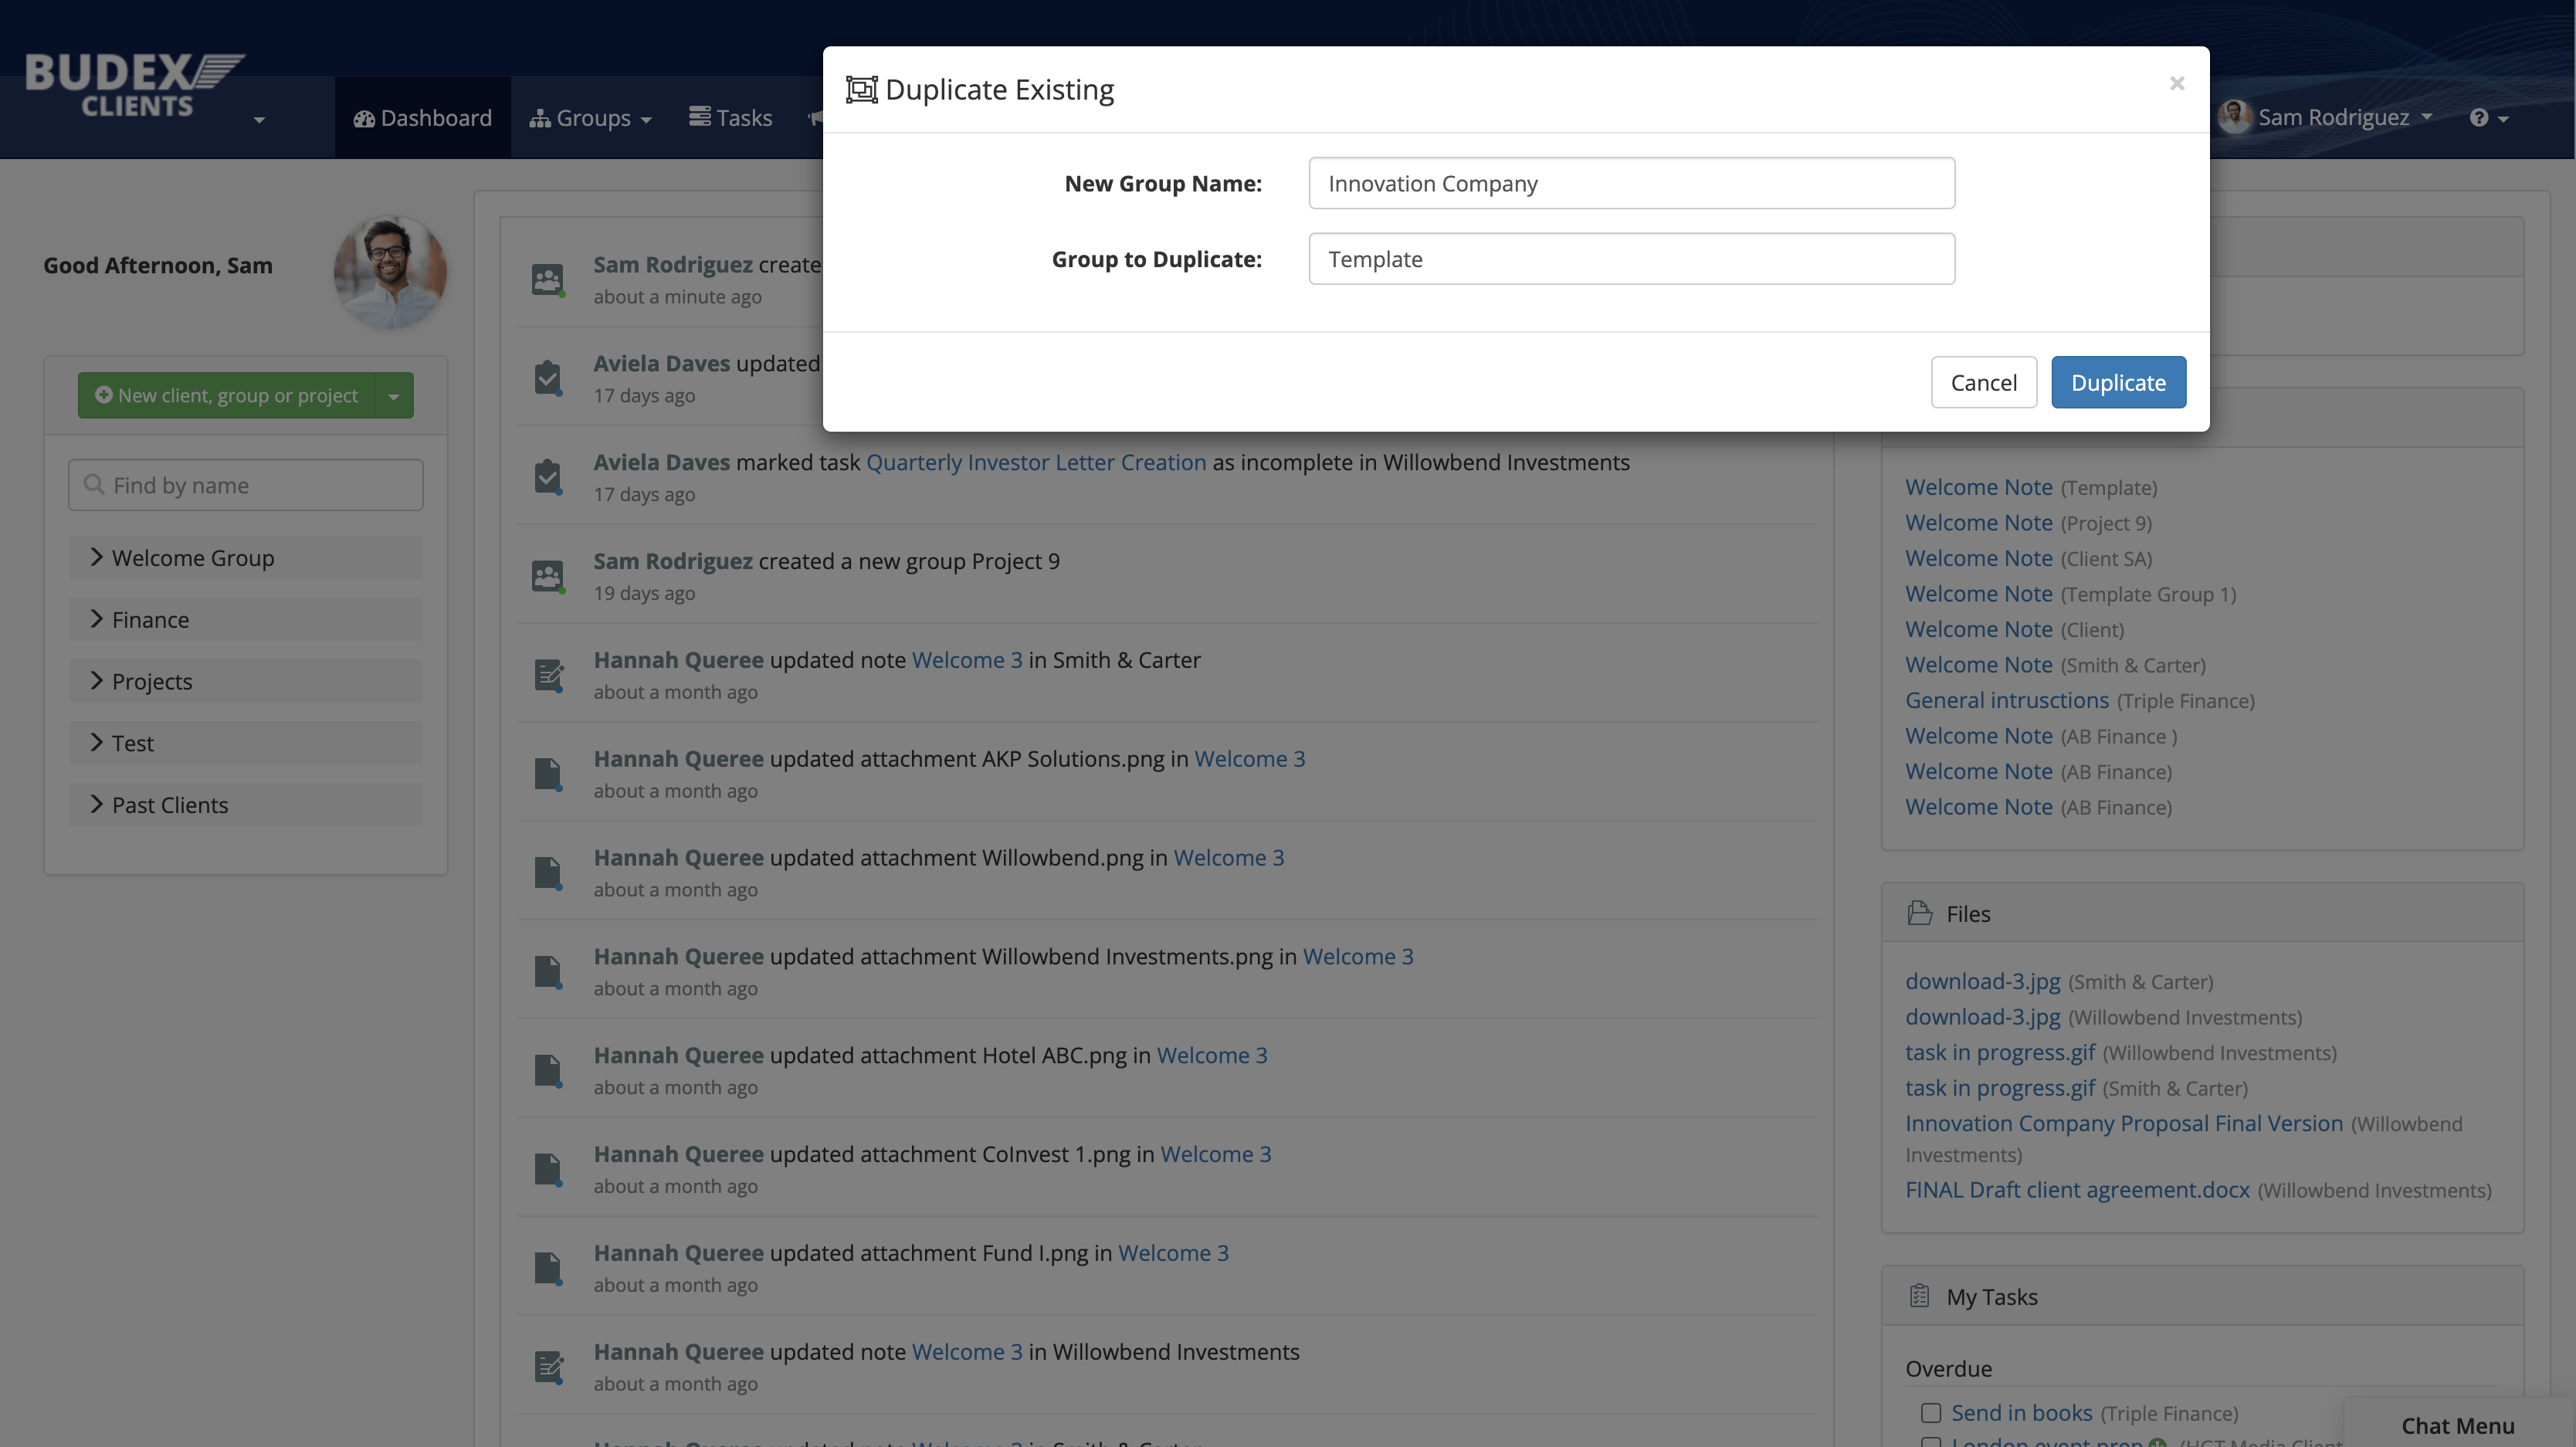
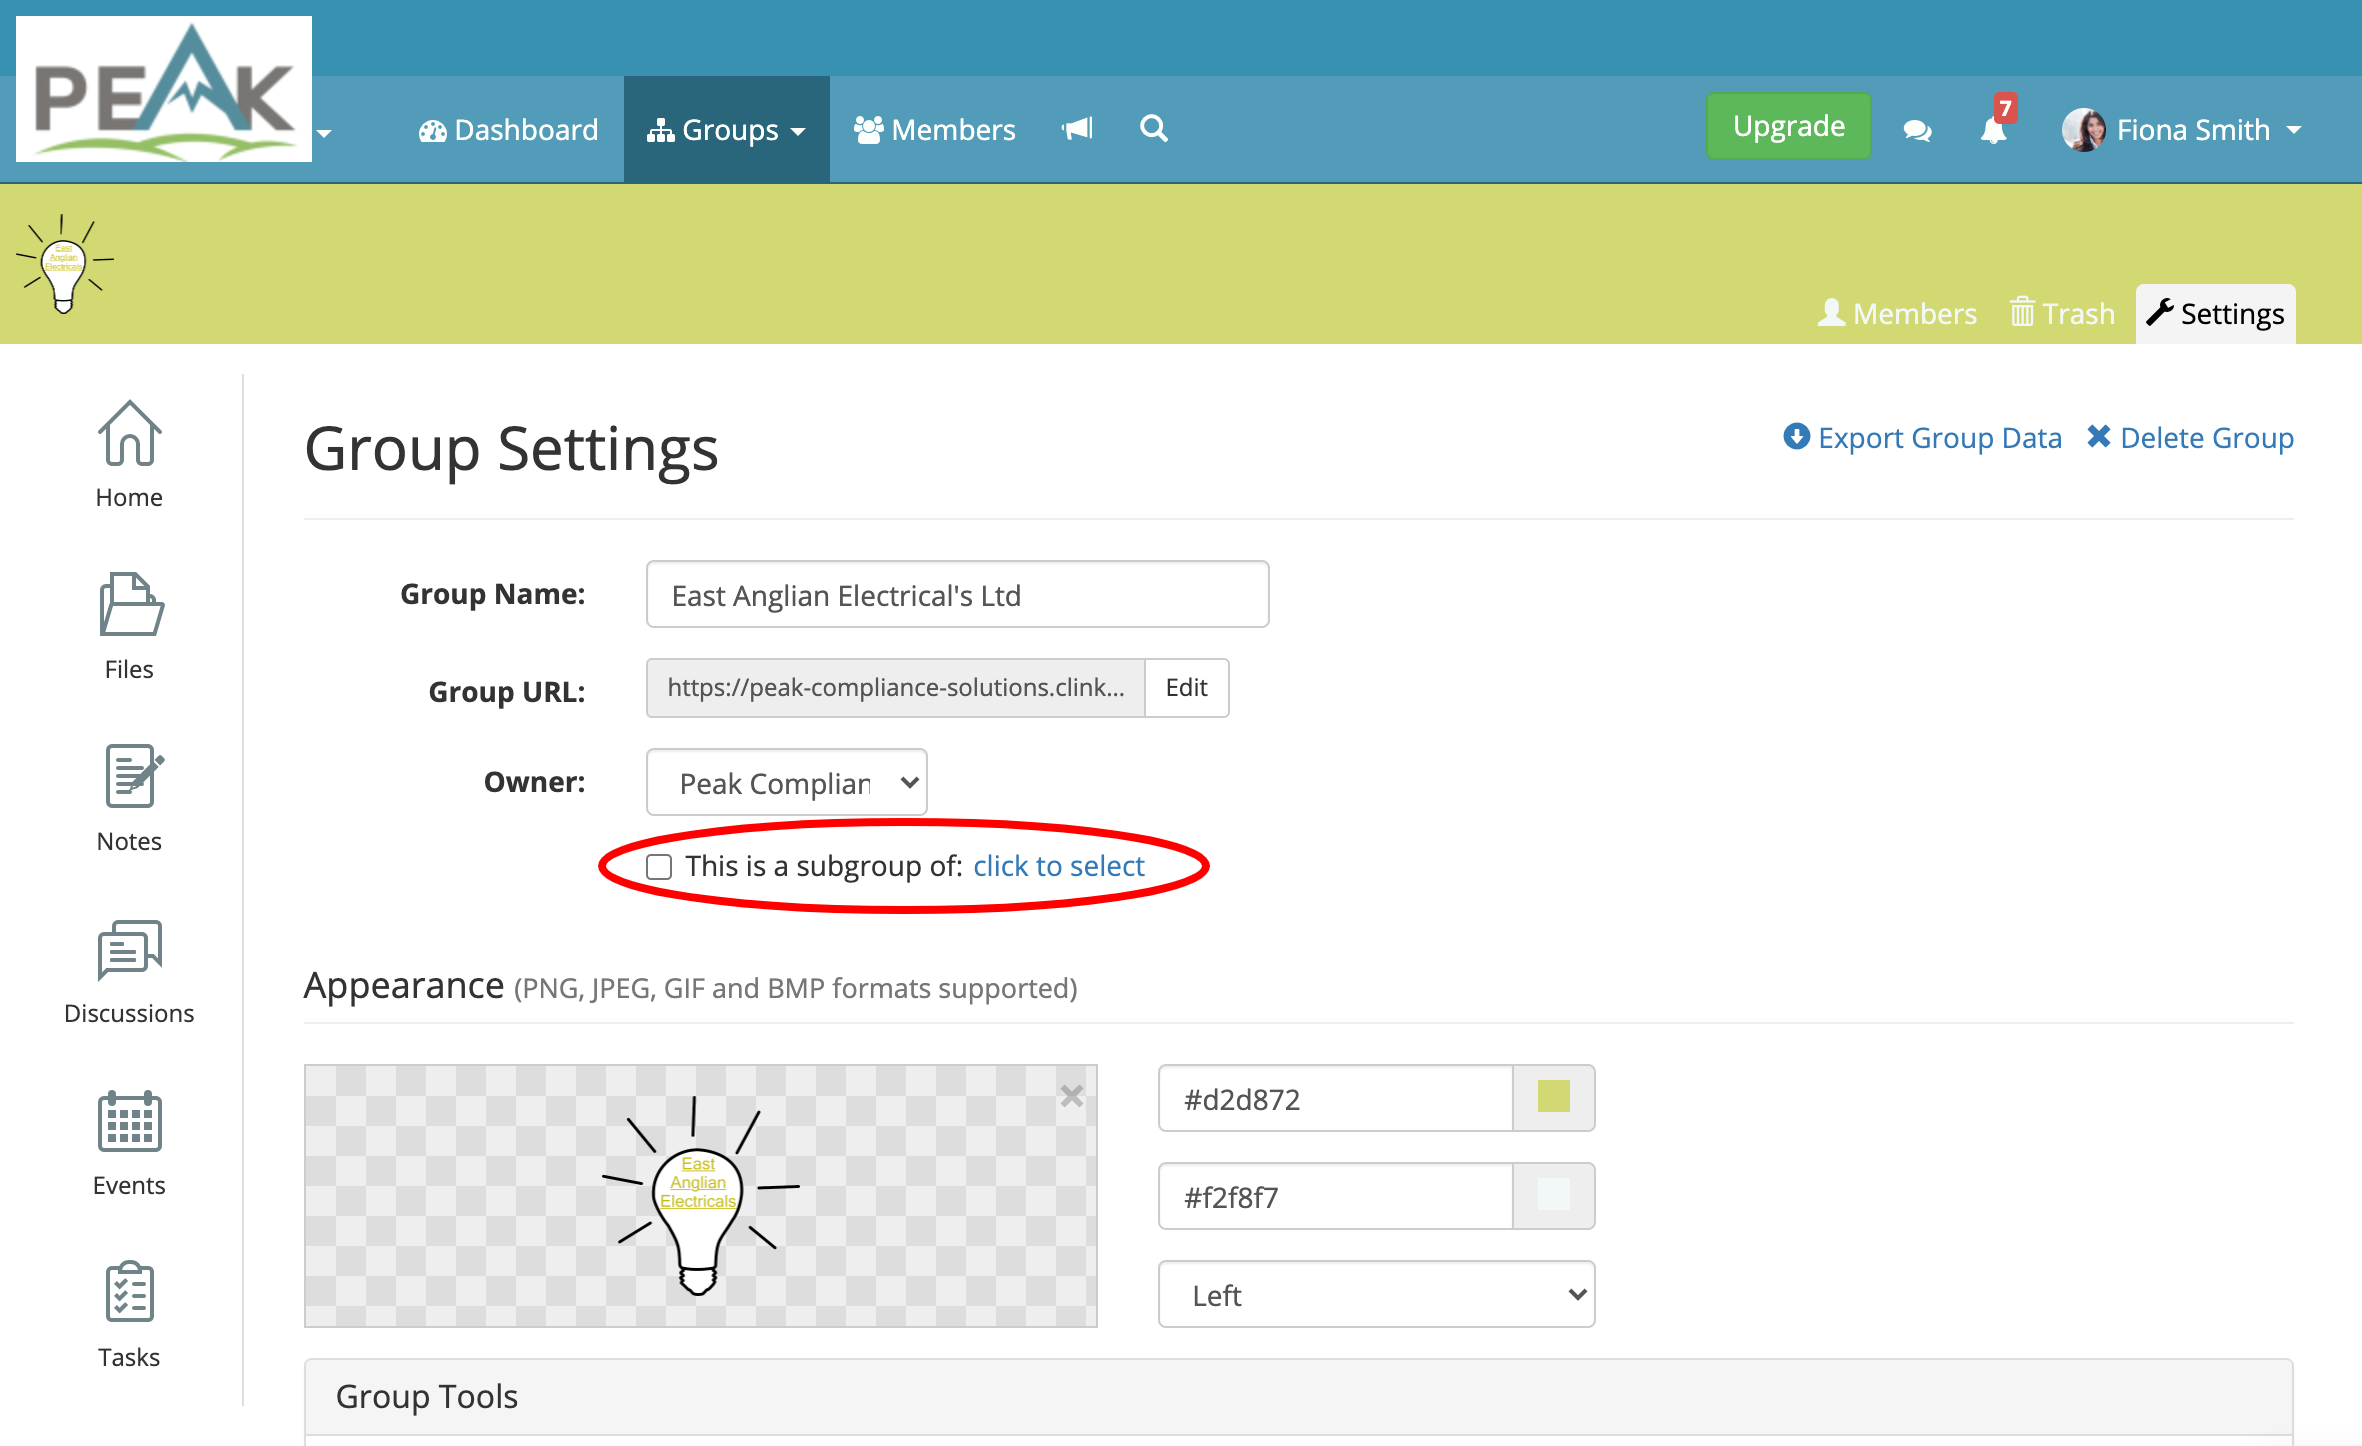
Sub Groups
If lot’s of your groups not only require the same initial set up, but will also require repetitive content (notes, files, folders, tasks, events & discussions) to be added, updated or deleted regularly. You can use the subgroups feature to more easily create and manage content by using a main group to hold content that is shared immediately to the associated subgroups, rather than having to enter content into each subgroup individually.
See more on how to set up Subgroups here, and the difference between subgroups and duplicating a group here.
Inviting Members
Inviting members to your portal is pretty straightforward, but there are a few different options depending on your workflow. The most common method being “invite member”, which simply means sending users an invitation directly to their email address, where they can sign up to the portal by creating a username and password.
You also have the option to create members manually, which means you’ll have to designate login details, but you have the control to make the accounts active on your terms. If you already have a list of the members you need to create and their details, for example if you’re moving over from a previous system, you can import them directly from a csv file.
Find more information on inviting members to your portal here.
Workflows
Depending on the way you use your portal, whether that’s with clients or partners, for sharing documentation or keeping track of projects, there are many different workflows that can be adopted. Here are some of the less obvious features within your Clinked portals, which if used correctly will help increase your efficiency and your clients/partners experience from a user perspective.
File Requests and Approvals
If you’re using your portal primarily for file sharing, it’s likely that you’re often chasing up documents from other users within the portal. Instead of constantly trying to get hold of them via email or other forms of communication within the portal, you can easily request a file upload to a specific location. This will send them an email notification from your portal, with a description of the file you’re requesting and a link directly to the folder they need to upload to, once the file has been uploaded you’ll receive a notification letting you know.
1. Select Request Files from the drop down
.png?width=770&height=433&name=request%20files%20(1).png)
2. Type the name of the file you're requesting, and the names/email addresses of the user.

Find more information on file requests here.
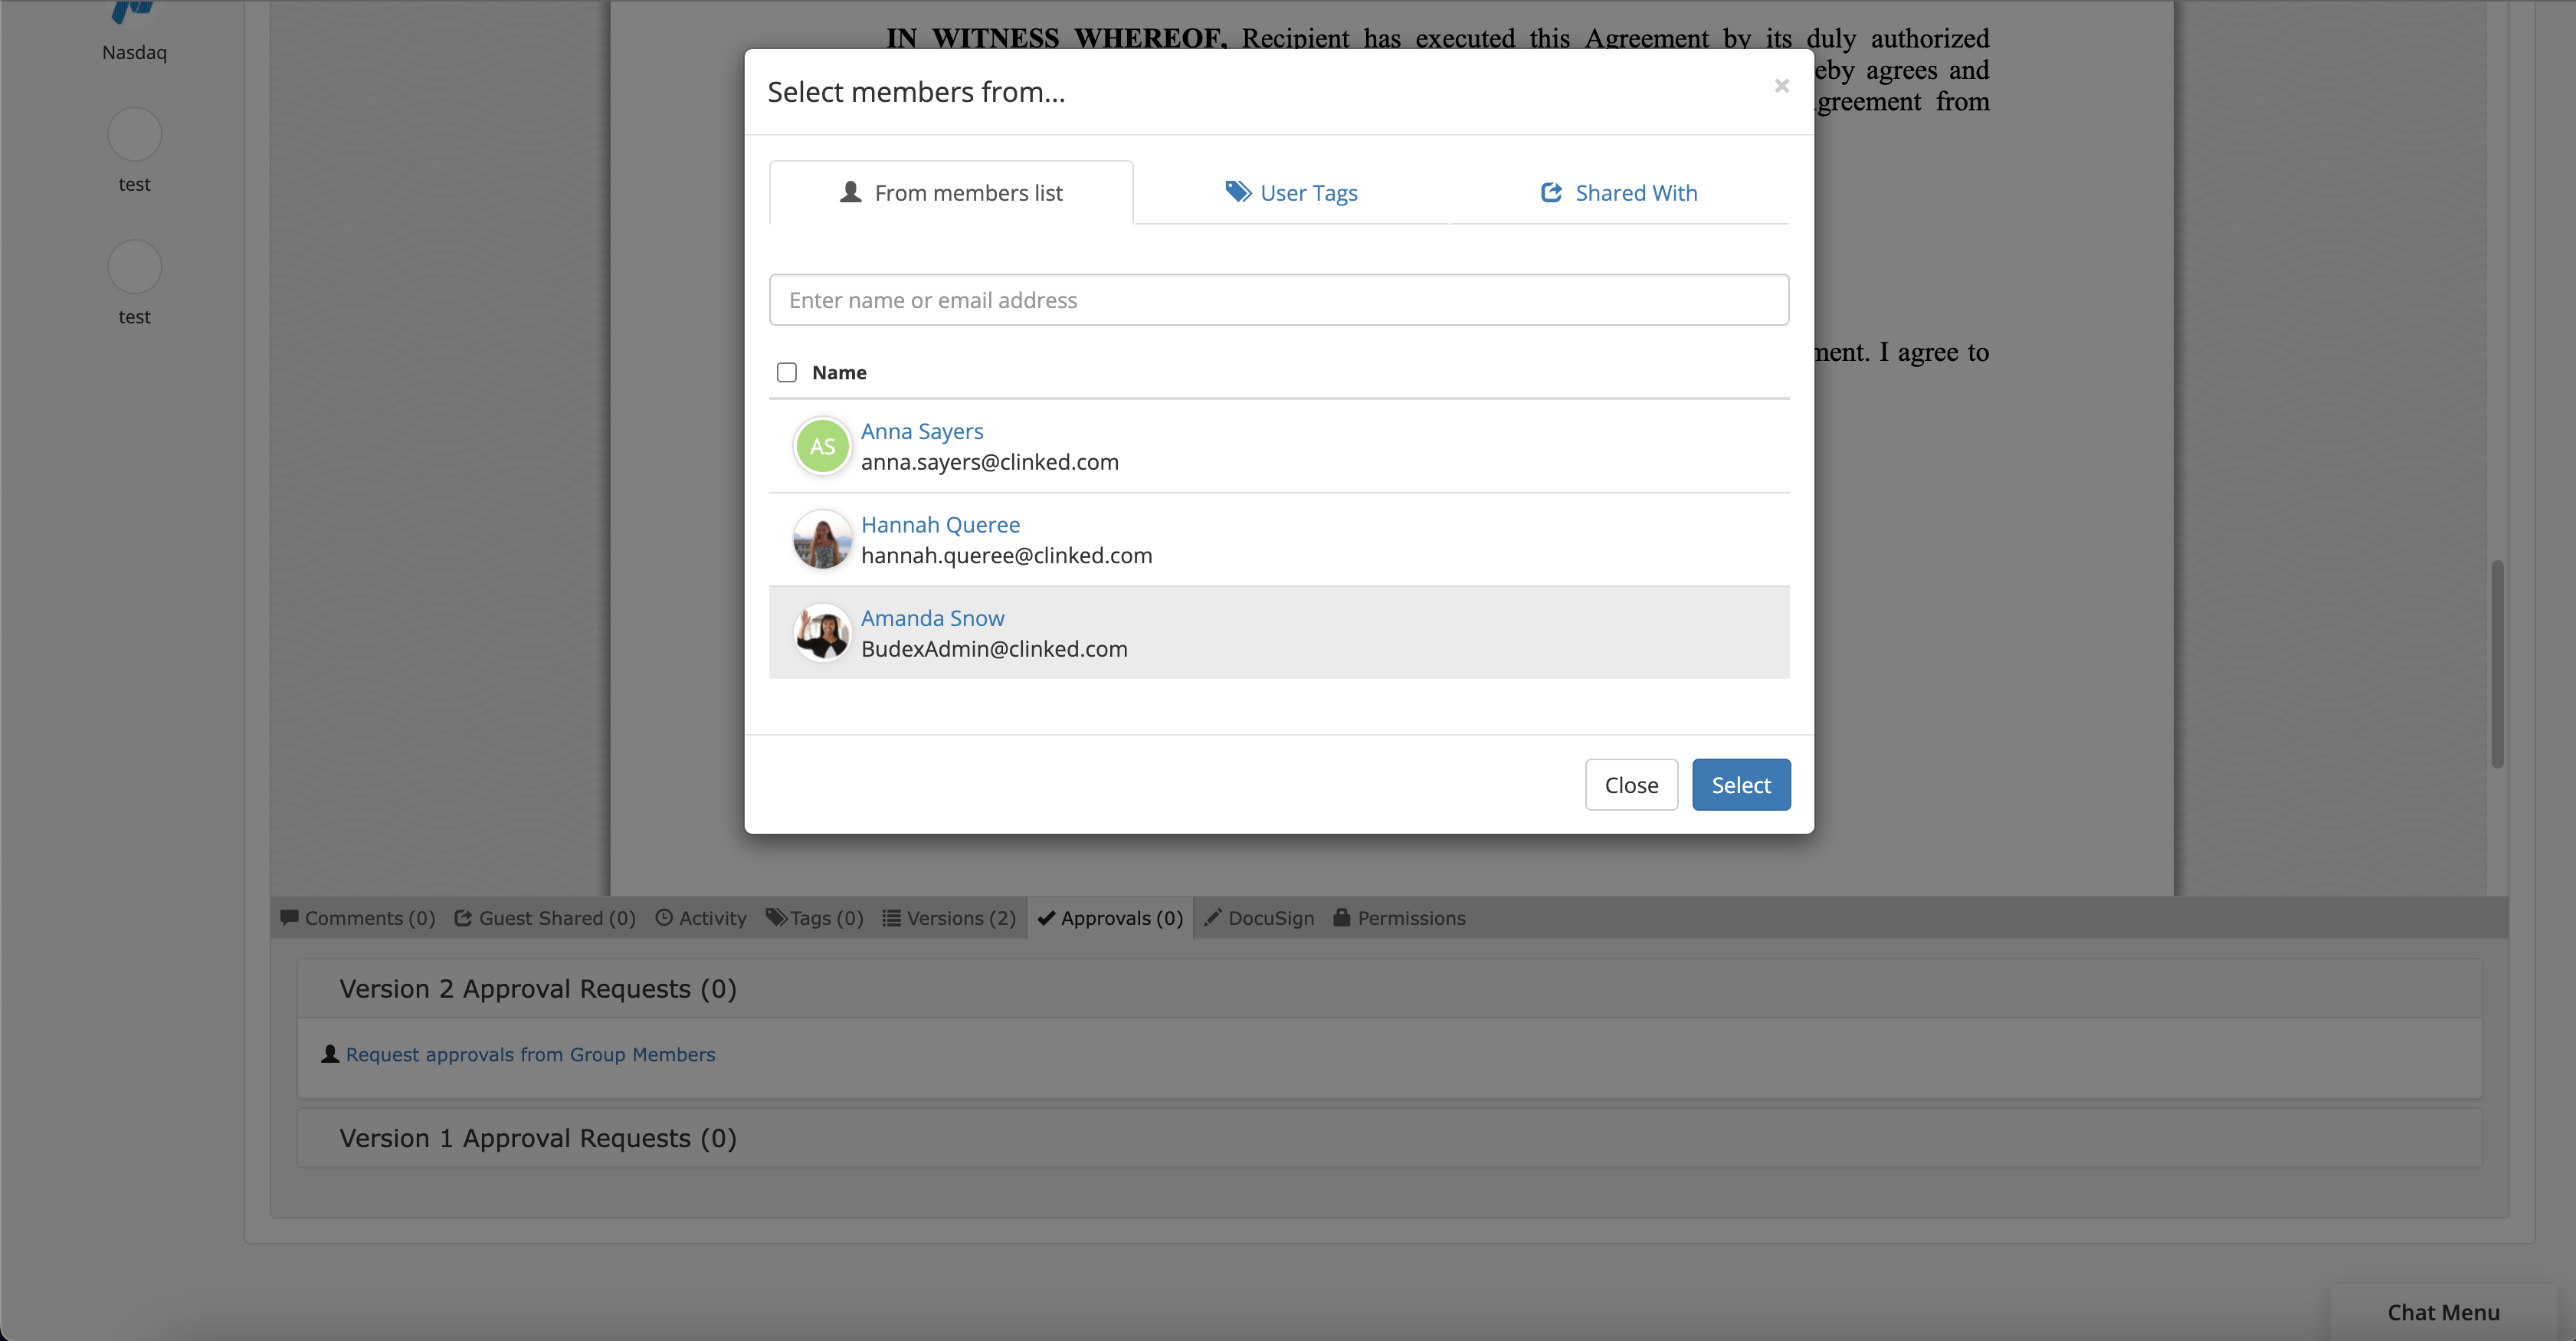
From a user perspective, once uploading a file you may need it to be reviewed and approved by another team member. You can do this using the approval request feature on any particular file. This allows you to request the approval of a document from any member of the group, sending them an email notification with a link to the file and the option to approve or reject, with a space to leave feedback.
1. Scroll to the bottom of a file, select Request approvals from Group Members from the Approvals tab.
.png?width=1366&height=768&name=request%20approval%20(1).png)
2. Select the group member/s you'd like to request an approval from, when you click Select it will send the request.
Learn more about approvals here.
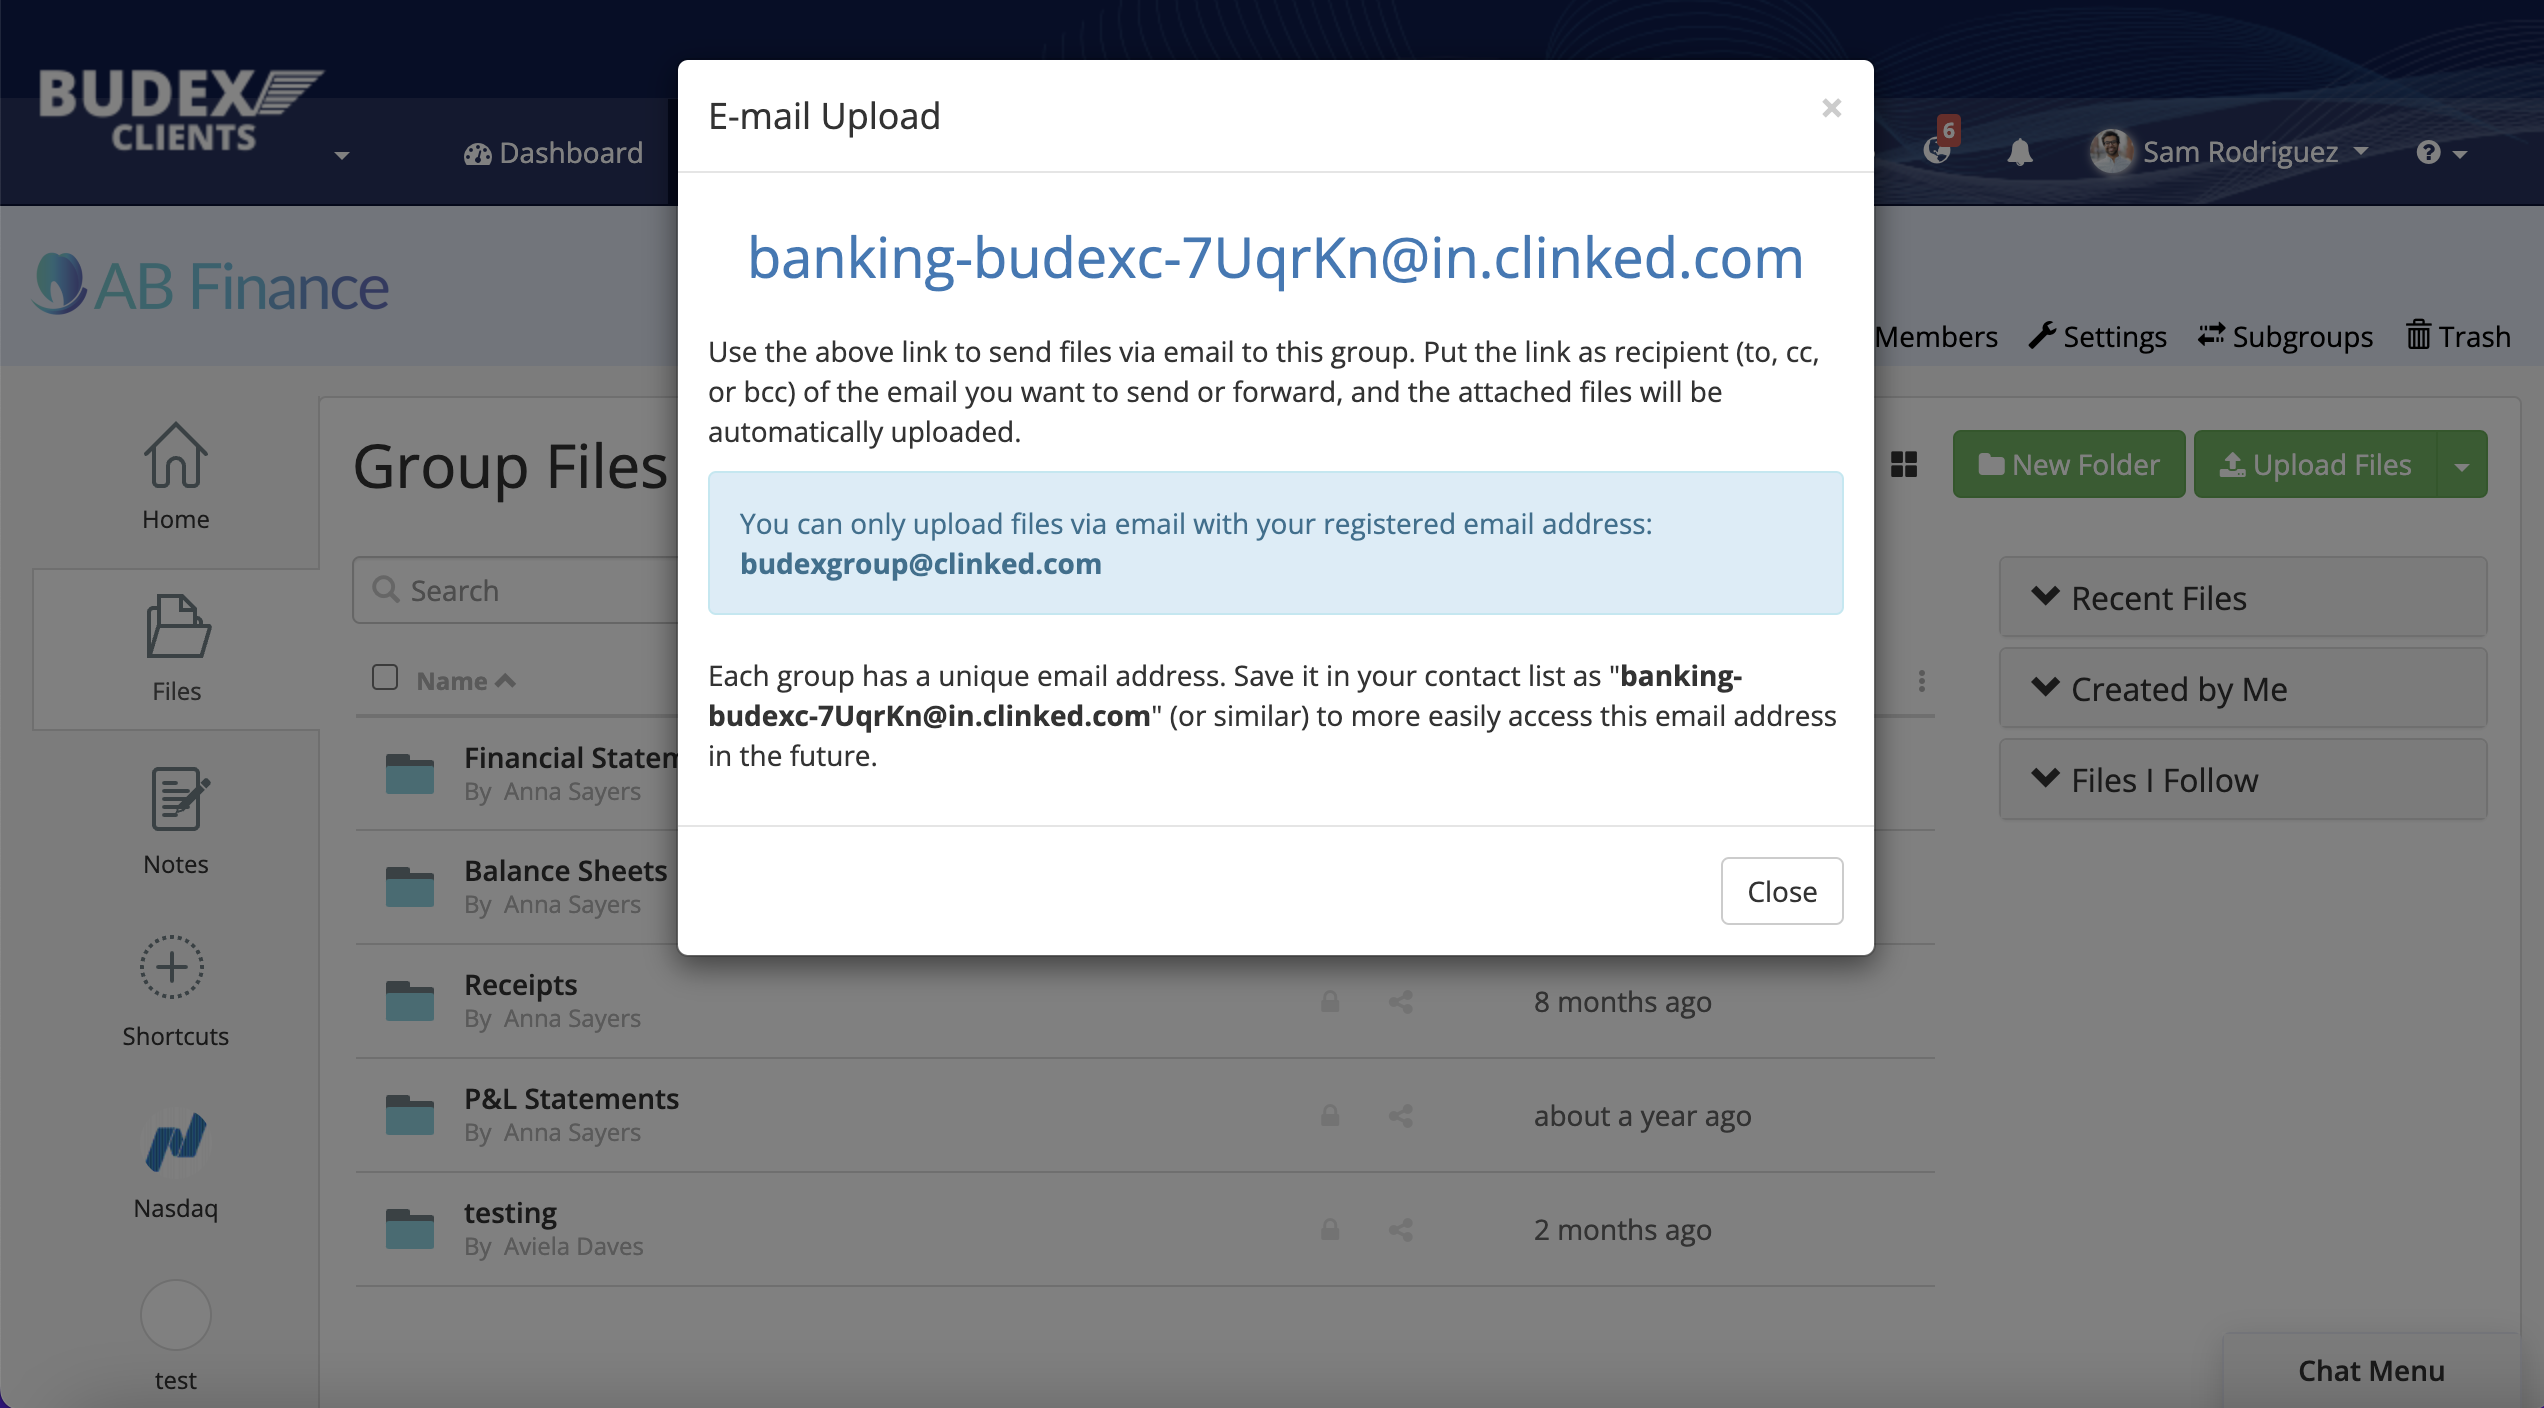
Email Upload
If you still use email to communicate with clients and team members, then there’s a handy little feature that allows you to upload files to Clinked directly from your email, by forwarding them to a unique email address that you can find for each group. If you save these emails under the group name in your contacts, it means you have an efficient way to quickly upload files to the relevant group, quickly and easily.
1. Select E-mail Upload from the drop down in the group you want to upload to.
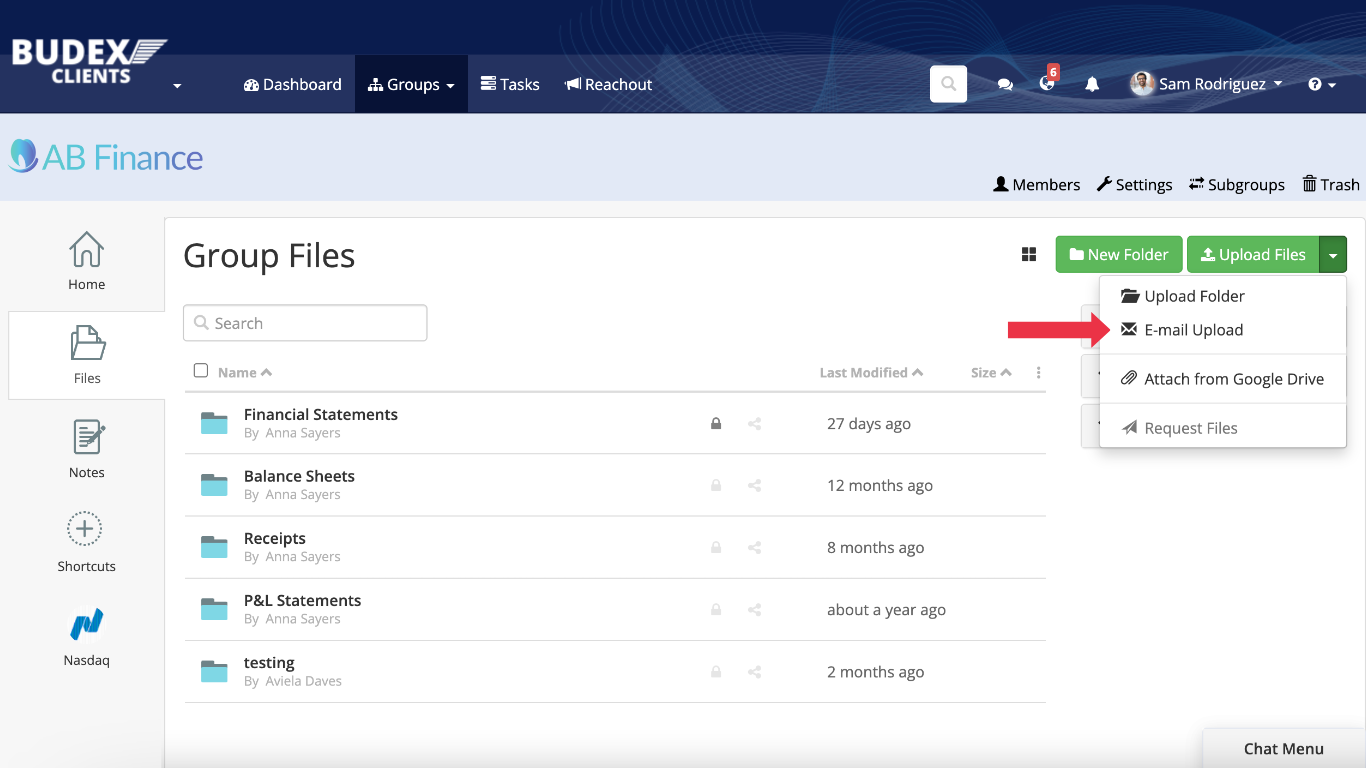
2. Copy the unique email address provided, save it in your contact list for ease of use.
Form Submissions
If you use our JotForm integration to collect form submissions from your portal, did you know there’s a way to automatically collect the data from those submissions as a csv file within your Clinked files? It’s super easy, check out this tutorial!
Learn more about our JotForm integration here.
Shortcuts
One of the newer features that we’ve released is Shortcuts. This is a great way to maximise efficiency by incorporating external platforms into your group homepage. It’s essentially a button that you can use to display a quick link to any web page that you use regularly with clients, such as a payment platform, or just a resource you’d like to display.
Learn more about shortcuts here.
So there you have it - just a few of the different features you can use to maximise efficiency in Clinked and the best practices for doing so. If you aren’t currently using Clinked but are interested in learning more, contact our team today!


Let Us Know What You Thought about this Post.
Put your Comment Below.